
The Findzip ransomware was discovered on February 22, 2017. At that time, it was thought that files would be irreversibly encrypted by this ransomware, with no chance of decryption. Turns out, that’s not quite true.
For those who get infected with Findzip (aka Filecoder), it’s still true that the hackers behind it can’t give you a key to decrypt it. There’s no honor among these particular thieves, as they’re lying about their ability to help if you pay the ransom.
However, all hope is not lost! If you made the mistake of not having a backup, or if your backup was also compromised by the ransomware, there’s still a chance for you to recover. It will not be fast or easy, but by following the instructions in this article, you’ll be able to regain your files. These instructions will be daunting for many, so if you have any doubts about your ability to follow them, please seek help from someone with more experience.
Special thanks to Jérôme Segura and @TheWack0lian for their help with this procedure. I wouldn’t have been able to build these instructions without their advice!
Gathering the materials
There are a few things you’re going to need before you get started.
- A working computer
- Xcode or TextWrangler
- Xcode command-line tools
- pkcrack source code
- One unencrypted file and the corresponding encrypted file
First, of course, you’ll need a working computer. This could be something like a second computer or could be another user account on the infected Mac. If you managed to force-quit the malware before it encrypted your whole user account, you may even be able to continue using your existing account.
These instructions assume that you’ll be doing the work on a Mac. If you need to do the decryption on a Windows or Linux computer, you’ll need to figure out how to compile and use pkcrack on that system.
Second, you’ll either need Apple’s Xcode development environment or a good text editor. Xcode is a rather large download that most people will never use in any way, so unless you have a reason to have Xcode, I recommend downloading TextWrangler. It’s an excellent text editor with many possible uses.
Next, you need to install the Xcode command-line tools, which fortunately does not require actually installing Xcode. If you don’t have a copy of Xcode already, open the Terminal app, which is found in the Utilities folder in the Applications folder.
In the Terminal, enter the following command:
xcode-select --install
When you do, you’ll see the following window:

Click the Install button to install the command-line tools, agree to the license, and then wait for the download and install process to complete.
Fourth, you’ll need to download the pkcrack source code. Some people, at this point, might be a little skittish about downloading something like this, for good reason, but I’ve tried it out myself and it works well.
Finally, you will need one of the files that got encrypted in both encrypted and unencrypted form. The file needs to be exactly the same as one that got encrypted. This could be a document that had been attached to an e-mail message that you had saved, but could still retrieve from the e-mail server, or a document that you had stored on a flash drive or other external storage. Make sure the document isn’t too large or two small. Something larger than 1000 bytes, but not thousands of times larger, would be ideal.
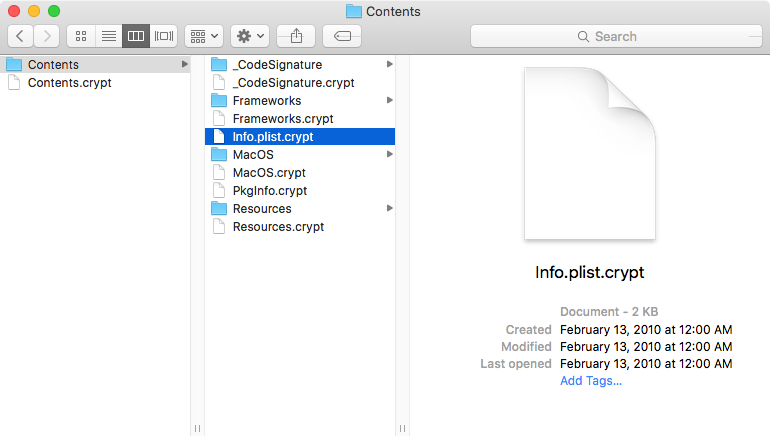
If you can’t find such a file, you may be able to use the malicious Findzip app against itself. If you ran the app from somewhere in your user folder – like your Downloads folder – then the app will have (amusingly) encrypted itself. In this case, you can simply download a portion of the Info.plist file extracted from the malware. (No worries, this file is not dangerous.) Unzip the downloaded file and you’ll find a file named Info.plist.part, which you’ll need later.
Then you’ll need to extract the encrypted Info.plist.crypt file from the malicious app on the encrypted system. Control-click on the malicious app and choose Show Package Contents from the contextual menu that appears. In the window that opens, there will be a Contents folder. Inside that is a file named Info.plist.crypt. Grab a copy of that file.
The rest of these instructions will involve using these Info.plist and Info.plist.crypt files, but any other pair of matching encrypted and unencrypted files will do just fine.
Compiling pkcrack
In order to use pkcrack, which will allow you to execute what is called a “known plaintext attack” against the encrypted file, you will need to compile it from the source code. The pkcrack source code you downloaded earlier should decompress into this:
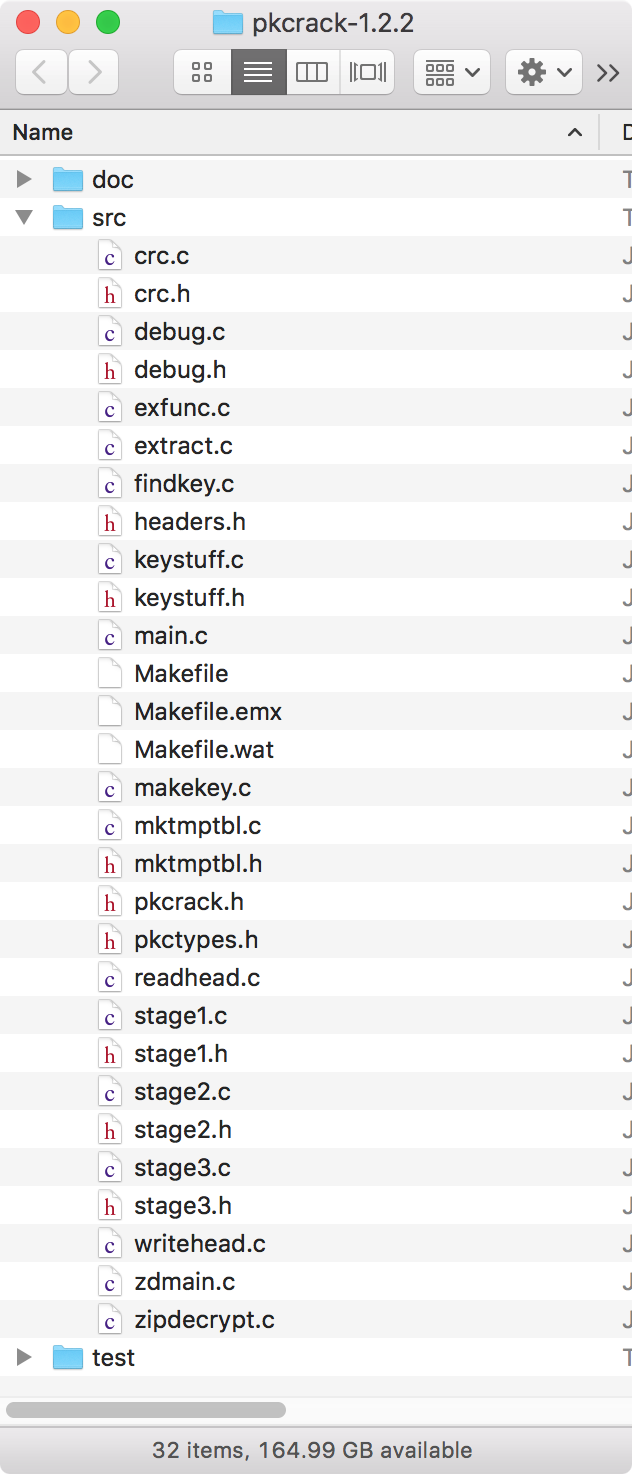
The files in the src directory are the ones you’ll be interested in.
Unfortunately, as is, this code won’t compile on macOS. Fortunately, there are some very simple changes you can make to these files to fix that. Time to break out either Xcode or TextWrangler and use that to edit several of these files.
First, open the file named Makefile. There will be a line near the top of the file reading:
CFLAGS=-O6 -Wall
Change the 6 to a 2, so that line looks like this:
CFLAGS=-O2 -Wall
Then save and close the file.
Next, you’ll need to open the exfunc.c file. Find the line near the top that reads:
#include
Delete this line, and only this line, then save and close the file.
Now, repeat this procedure, removing exactly that same line from the following files:
extract.c main.c readhead.c zipdecrypt.c
Once you’re done, you’re ready to compile the code. Fortunately, this is quite easy. Open the Terminal app again and type the following, but do not press return:
cd
You can’t see it, but there’s a space after “cd”, so be sure to put that space there.
Next, drag the src folder from the pkcrack-1.2.2 folder onto the Terminal window. That will insert the path to that folder into the command. Now switch back to the Terminal and press return. This changes the current working directory in the Terminal to the src folder.
Finally, enter the following command:
make
This will compile the code, echoing a lot of text into the Terminal window that you don’t really need to worry about. As an example, here’s what this looked like on my system, with much of the output omitted in the middle for brevity:
Hyperion:~ thomas$ cd /Users/thomas/Desktop/pkcrack-1.2.2/src Hyperion:src thomas$ make gcc -O2 -Wall -c -o crc.o crc.c crc.c:24:13: warning: unused variable 'RCSID' [-Wunused-variable] static char RCSID[]="$Id: crc.c,v 1.3 1997/09/18 18:07:24 lucifer Releas... ^ 1 warning generated. [...] int makekey.c:19:13: warning: unused variable 'RCSID' [-Wunused-variable] static char RCSID[]="$Id: makekey.c,v 1.1 1997/02/15 09:44:44 lucifer Re... ^ 3 warnings generated. gcc -o makekey -O2 -Wall makekey.o crc.o keystuff.o Hyperion:src thomas$
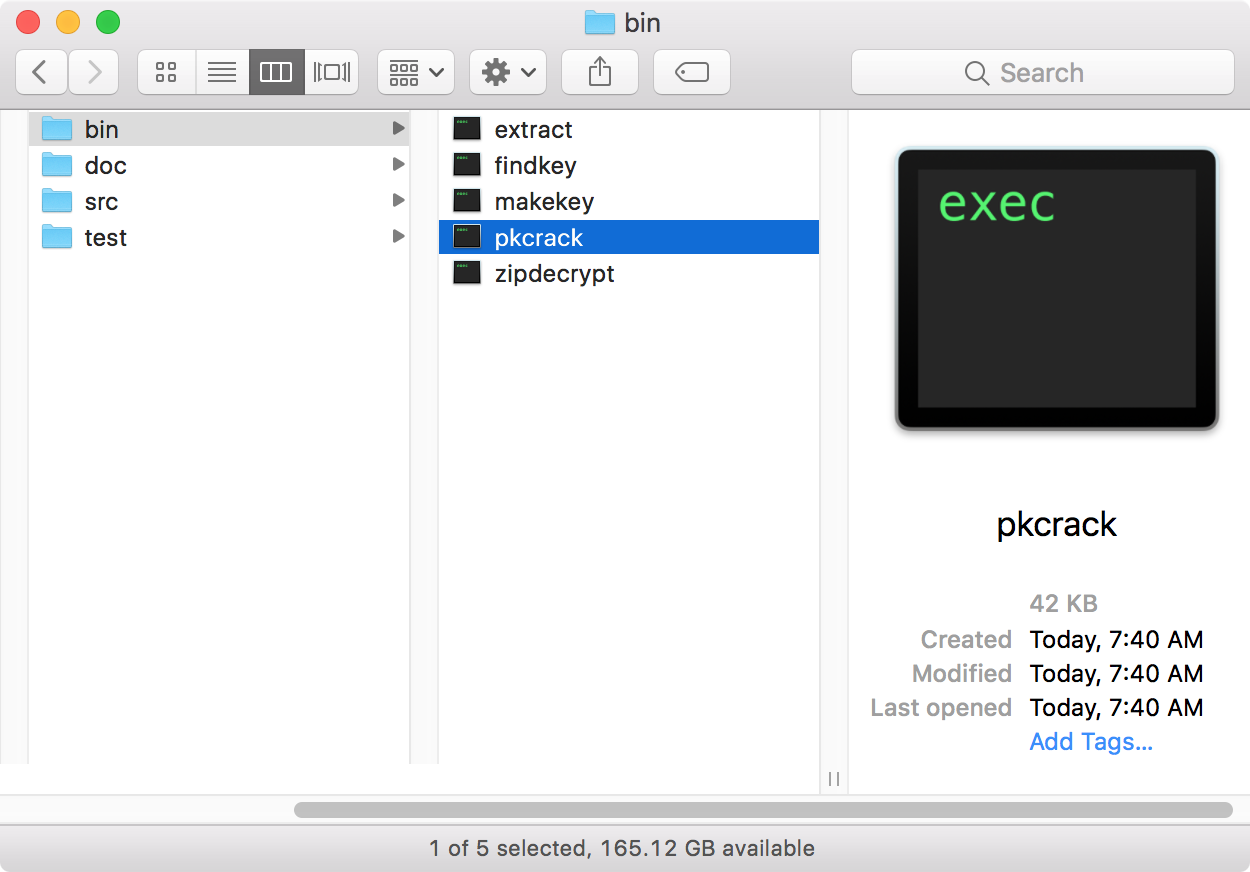
There’s no need to worry about the warnings. You’ll know the build was successful if you now see the following files in the src folder:
extract findkey makekey pkcrack zipdecrypt
These are Unix executable files, also called “binaries.” For ease of use, move these files into a separate folder. I put them into a “bin” folder as shown here:
Finding the keys
The next step will involve using that pair of encrypted and unencrypted files obtained earlier to find three keys. For this example, we’ll use the Info.plist.crypt and Info.plist.part files referred to previously. Move those files into the bin folder, alongside the pkcrack binaries. If you are not using a file other than Info.plist, rename the original, unencrypted file to something else, likeNext, back in the Terminal, use the “cd” command again to change to the bin directory. Then, enter the following command:
./extract -p Info.plist.crypt Info.plist
This will produce a file called Info.plist, but its contents are still encrypted.
Of course, replace these names with the correct names for the file you’re working with, if you’re not using this Info.plist file. If the filenames you’re working with have spaces in them, you’ll need to enclose them in quotes. For example:
./extract -p "Some Word file.docx.crypt" "Some Word file.docx"
Now you’re ready to start searching for the keys. Enter the following command:
./pkcrack -c Info.plist -p Info.plist.part
(Again, be sure to use quotes around any filenames that contain spaces.)
The pkcrack app will start working on the encrypted file. Depending on the file, it could take a while, but for the Info.plist file in this example, and on my high-end MacBook Pro, it took around than a minute.
You’ll know it’s done when it beeps twice, and the Terminal is displaying something like this:
Hyperion:bin thomas$ ./pkcrack -c Info.plist -p Info.plist.part Files read. Starting stage 1 on Sat Feb 25 08:05:04 2017 Generating 1st generation of possible key2_1544 values...done. Found 4194304 possible key2-values. Now we're trying to reduce these... Done. Left with 2941 possible Values. bestOffset is 24. Stage 1 completed. Starting stage 2 on Sat Feb 25 08:05:11 2017 Ta-daaaaa! key0=c054acf9, key1=d1656d7b, key2=3549626f Probabilistic test succeeded for 1525 bytes. Ta-daaaaa! key0=c054acf9, key1=d1656d7b, key2=3549626f Probabilistic test succeeded for 1525 bytes. Searching... 11.2%
At this point, pkcrack is trying to find the passcode for the encrypted file, but that will not succeed due to the length of the passcode used by the malware. You can force it to cancel and quit by pressing control-C.
Fortunately, you don’t need the passcode… the three keys it found can be used to decrypt all the other decrypted files. Make a note of those three keys, labeled key0, key1, and key2.
Decrypting the files
At this point, we can decrypt the Info.plist.crypt file, as well as any other files encrypted by the malware on that particular Mac. Enter the following command:
./zipdecrypt c054acf9 d1656d7b 3549626f Info.plist.crypt Info.plist.zip
Be sure to replace the keys in this command with the ones obtained from your encrypted file, in order.
The result of this command will be the creation of a new, unencrypted Info.plist.zip file. Double-clicking this file will unzip it. The zip file will contain a series of nested folders, starting with “Users” and going through the entire path that the file was original found in. Dig down into each subsequent folder until you reach the original, now unencrypted, file.
Of course, you already had the original file, in this case. However, you can now repeat this zipdecrypt command with any other encrypted files, using the same keys. Recovering a large number of files in this manner will be tedious, but on the positive site, you can use that time to contemplate how this could have been avoided by having a good set of backups!